If you want your attic insulated but don’t know where to begin, the attic is the best place to start when improving your home’s insulation. Without proper insulation, it can lead to significant heat loss and air leakage, making your home less energy-efficient. Many homeowners choose to spray foam insulate attic spaces because of its efficiency, durability, and ease of installation. Many wonder if they can install spray foam insulation themselves or if they need to hire a professional contractor. The process may seem simple, but knowing what it looks like and how much it will cost is critical.
What to Consider When Insulating an Attic with Spray Foam?
Before insulating an attic with spray foam, it’s important to consider key factors to ensure success.
Current Condition of the Attic
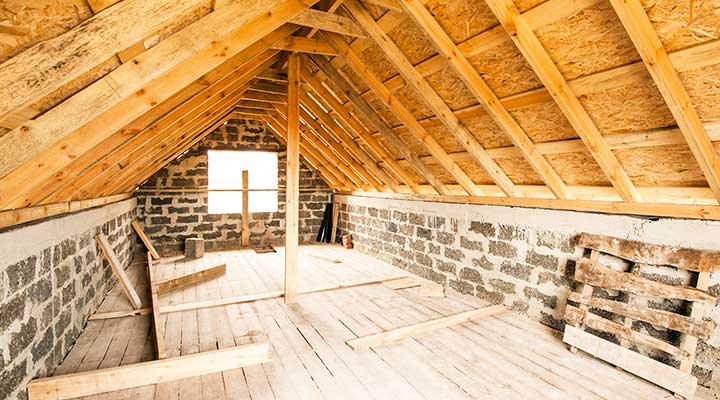
Begin by assessing the current conditions of the attic. Check for any existing issues like air leaks or moisture problems, which could reduce the effectiveness of the insulation. Carefully remove any existing insulation, if present, and fill gaps or holes using sealants to prevent further leakage. Addressing these concerns early will prepare the space for a smooth installation process.
Next, inspect the state of the attic thoroughly. Look for potential problems by checking for leaks or signs of trapped moisture. If you identify these issues, resolve them before applying the foam. This will not only protect your home from future damage but also maximize the foam’s insulating capabilities. Taking the time to handle these important factors ensures a well-sealed and efficient attic.
Do I Want To Use My Attic As a Conditioned Living Space?
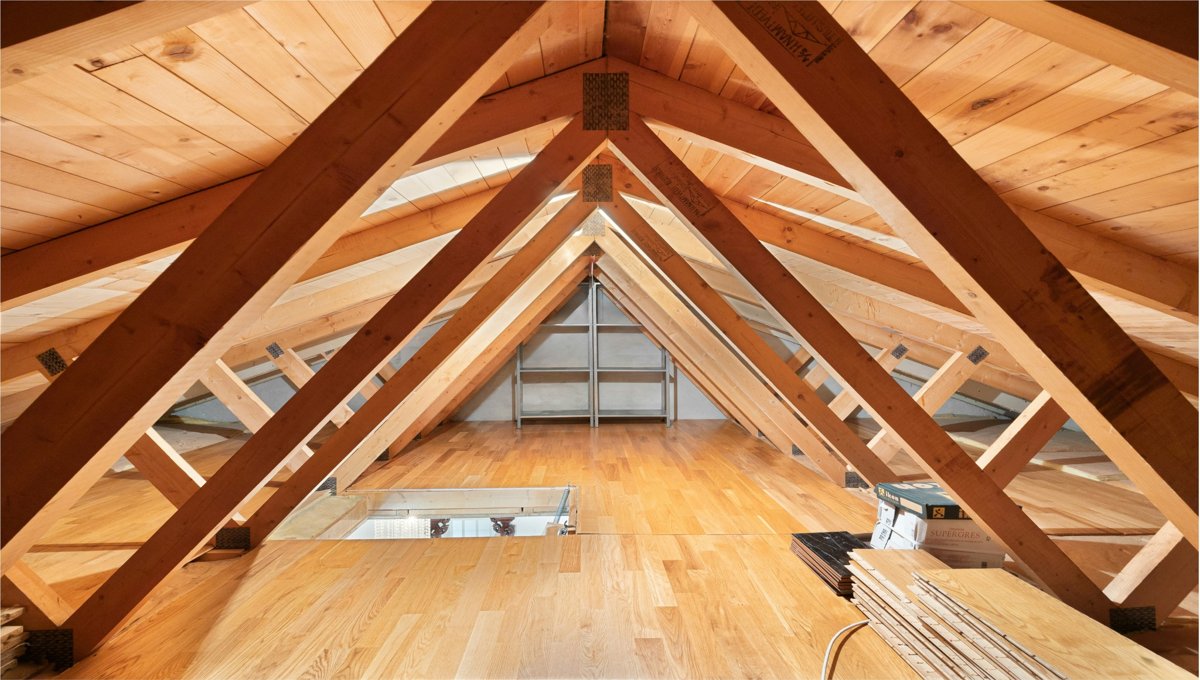
To answer this question, you need to determine whether your attic will serve as a conditioned living space or remain separate from the rest of the home. Insulating the attic floor is suitable if you don’t want excess heat to invade your home or increase the load on your HVAC system. However, this approach may leave ductwork in the attic vulnerable to overheating, which can contribute to energy inefficiency. On the other hand, insulating the roofline ensures the outside air is prevented from entering, supporting a consistent temperature throughout the house and creating a more functional space.
The benefits of spray foam insulation go beyond summertime use. It is useful year-round, providing an airtight seal that prevents heat transfer. During wintertime, it keeps hot air inside, ensuring the home remains cozy while lowering energy bills. Whether you choose to insulate the floor or the roofline, spray foam insulation can help create a comfortable, efficient environment without the complications of isolated or inconsistent climates in your attic.
Local Building Codes
When insulating your attic with spray foam, it’s essential to follow local building codes to ensure compliance and a safe installation. Different areas may have specific requirements for materials and may even restrict certain types of insulation. Check for fire safety ratings and the proper R-value required for your climate zone to maximize energy efficiency. Additionally, good ventilation prevents moisture buildup and helps maintain a healthy indoor environment. Make sure to follow the installation guidelines and secure any necessary permits to complete the job effectively.
Long-Term Maintenance
Regular long-term maintenance is crucial to keep your attic’s spray foam insulation functioning properly. Start by inspecting the attic for signs of wear, such as cracks, gaps, or damage that might diminish its effectiveness. Check for any vents blocked by insulation or other obstructions in the airflow to avoid issues like moisture buildup, which can lead to mold or rot. Address these problems promptly by repairing damaged areas to prevent further complications. By maintaining your attic insulation, you can protect your home’s energy efficiency and structural health for years to come.
How to Spray Foam an Attic to Improve Efficiency: A Detailed Guide
To insulate your attic effectively with spray foam insulating material, there are 5 key steps you need to follow.
- Prepare the Base
- Evaluate Energy Needs
- Select the Ideal Type of Spray Foam
- Determine Insulation Thickness
- Apply Foam with Precision
Materials Needed
- Spray foam insulation kit
- High-quality vapor barrier paint
- Protective gears, including safety goggles, disposable coveralls, nitrile gloves, and a respirator mask
- A utility knife or foam saw for cutting and trimming
Step 1: Prepare the Base
Prepare the attic rafters and floor by clearing unnecessary items and removing old insulation if present. This will help avoid issues that could hamper the effectiveness of the foam. Seal small cracks and holes using weatherstripping or caulk to prevent air leakage, and thoroughly clean the surface to ensure the foam can adhere A stable surface is essential for achieving optimal results.
Step 2: Evaluate Energy Needs
Conduct an energy audit to locate areas lacking insulation or spots with air leaks. Start by checking existing caulking and weatherstripping, and use tools like an infrared camera for a more precise visual inspection. Focus on identifying potential missing or damaged sections that could impact the insulation’s performance. This step ensures your attic is fully prepared for effective spray foam application.
Step 3: Select the Ideal Type of Spray Foam
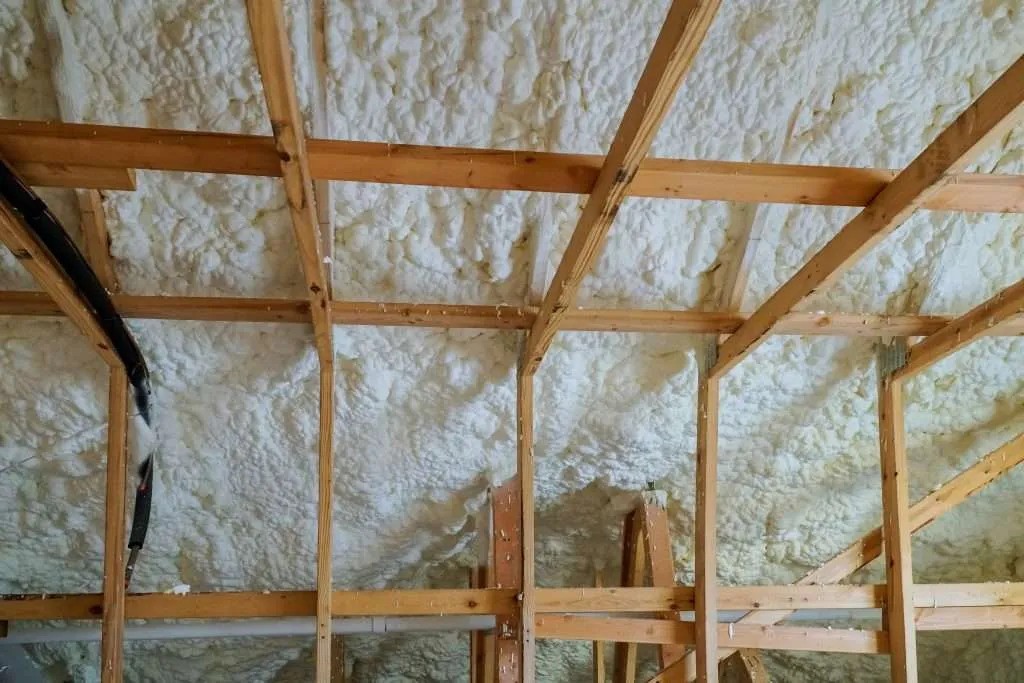
When deciding on the right type of spray foam, it’s essential to consider the needs of your attic. After conducting an energy audit, you can select the appropriate insulation that matches the specific requirements of your space. Spray foam comes in two main types: open-cell and closed-cell. Open-cell foam is a low-density product that is ideal for thicker applications. It expands to provide a strong air seal and is more cost-effective compared to its counterpart. However, it may lack the durability and moisture barrier provided by closed-cell foam, which has a higher R-value per inch and is denser.
Closed-cell foam is better suited for areas requiring a stronger barrier or greater depth. It can be installed on both the floor and roofline, making it versatile for various applications. For standard attic insulation, you may need a depth of 3 to 6 inches for closed-cell foam or 7 to 12 inches for open-cell foam. Additionally, vapor retardant coatings may be added to meet specific moisture requirements. Considering these options ensures you create an effective insulation solution tailored to your attic’s unique structure.
Step 4: Determine Insulation Thickness
Before applying spray foam insulation, it’s essential to accurately determine the required thickness for your attic. Start by measuring the square footage using a measuring tape to record the length and width of the space. Multiply these numbers to find the total coverage area. Refer to the manufacturer’s instructions on your selected product to understand the ideal thickness for your project. Use this information to calculate the amount of spray foam needed and ensure it aligns with the recommended specifications for efficiency and proper coverage.
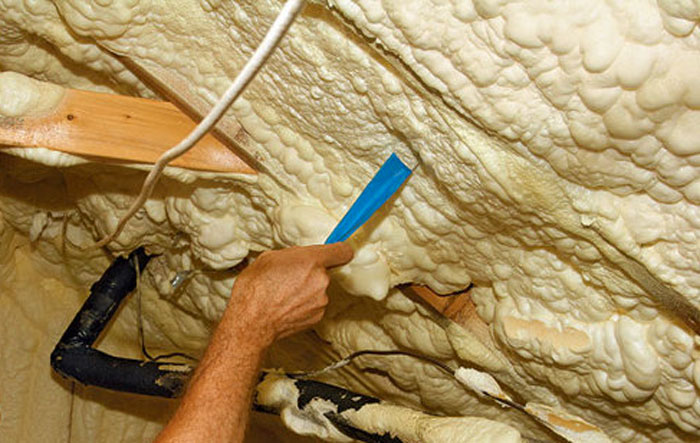
Step 5: Apply Spray Foam with Precision
Begin by shaking the can of spray foam well to mix the product properly. Hold the can upright and apply a thin, even layer to the surfaces, starting from the bottom and working your way up. Ensure you cover all areas, including corners and edges, for consistent insulation. Follow the manufacturer’s instructions to allow the foam to expand and cure effectively. Once the foam is cured, it will create a barrier that helps prevent air leakage and provides insulation for long-term
How Long Does Installing Spray Foam In An Attic Take?
The time to complete the installation of spray foam insulation in an attic can vary depending on the size of the project and the amount of preparation work needed. For a small attic, where existing insulation has already been removed, the process may take as short as a day. For instance, an attic with a floor area of 700 square feet can be completed quickly under ideal conditions with spray foam floor insulation.
However, for larger projects, such as attics with 3,000 square feet or more, or where additional preparation is required, it might take two to three days to finish. Factors like the removal of old insulation and ensuring a clean workspace add to the timeline. Whether your project is small or large, proper planning ensures the job is done efficiently.
Also Read: Should Attic Insulation Be Removed Before Adding Spray Foam?
How Much Does Installing Spray Foam In An Attic Cost?
The costs of installation for spray foam insulation in an attic can vary depending on several factors. As a general rule, insulating the attic floor is less costly than the roofline since the floor requires fewer board feet of raw material. For example, open-cell spray foam costs around $9 per square foot, while closed-cell foam may cost up to $10 per square foot due to its higher density and insulation value. The type of spray foam you choose and the depths necessary for your application significantly impact pricing.
For a smaller project, such as an attic with $4,000 in size, the cost is typically lower. However, for larger projects, like spaces exceeding 3,000 square feet, the cost could rise to as much as $17,000. Additional factors, including the length and width of the attic and whether it includes both sides of the gables, also influence the budget. Proper planning and material selection ensure that the investment meets your insulation needs efficiently.
The Downsides of DIY Spray Foam in Your Attic
While spray foam insulation is a premium product that can insulate your home and provide an airtight seal, it’s not ideal for a DIY project. This two-in-one application makes homes more comfortable and energy efficient, but the price tag and complexities can be daunting. If you’re considering installing spray foam insulation yourself, keep in mind that managing challenging steps without professional tools can lead to inefficiencies. We strongly recommend hiring professionals for attic applications to ensure the best results, as there are several reasons why DIY may not save you money in the long run.
The Hidden Costs of DIY Spray Foam Materials
Using DIY spray foam kits for your attic may seem like a cost-effective option, but it often leads to more expenses than savings. While these kits are great for small-scale air-sealing projects, attic spaces don’t usually qualify. A standard kit costing $400 only covers 200 board feet, which means if your attic requires 3 inches of insulation, one kit can only insulate a maximum of 66 square feet. To cover the entire area, you’d need to purchase a significant quantity of raw materials, which cancels out any cost-savings homeowners might hope to enjoy. For larger home improvement projects, hiring professionals ensures a better ROI on your investment and saves time and effort.
The Importance of Ventilation and Safety for DIY Spray Foam
When applying spray foam insulation in your attic, you’ll need to invest in ventilation equipment and PPE to ensure a safe and effective installation. Understanding spray foam insulation safety is essential, as it is a unique product manufactured on-site through a chemical reaction, which produces a byproduct called off-gassing.These fumes can be toxic to inhale, requiring professional-level safety measures. Contractors wear suits, respirators, and set up ventilation systems to direct fumes outside the home.
If you plan to do it yourself, you’ll need to acquire a ventilator and determine how to direct the fumes using fans, flexible ducts, or tubes to maintain proper airflow. Failure to do so could cause the fumes to linger and absorb into fabrics, creating long-term issues. Without the right tools and precautions, DIY insulation can put your health and home at risk. Hiring a professional contractor ensures these specific safety measures are handled correctly, protecting your air space and delivering high-quality results.
Challenges of Accessibility When Spraying Foam in an Attic
Spraying foam insulation in an attic can be tricky due to frustrating accessibility issues. Every attic is different, and certain factors like a tall roofline, an odd shape, or hard-to-reach areas can make it a struggle to insulate these spaces effectively. A professional contractor often solves these challenges by using specialized tools and techniques to ensure the foam is installed correctly. They also maintain consistent depths across every area of the attic, providing complete coverage and avoiding gaps that could compromise efficiency. Without expert knowledge, it’s difficult to cover all areas properly, especially in challenging spaces.
The Risks of DIY Spray Foam Kits
Using DIY spray foam kits may seem simple when watching a video online, but the process is often deceptively complex. The foam is created through a chemical reaction, which depends on maintaining the right consistency of several variables. Without proper monitoring tools to keep these variables constant, the insulation may fail. If the foam is not applied correctly, it can be left in the home improperly, making it difficult to remove. In such cases, you may need to hire professionals to replace attic insulation, which increases the overall cost and effort. DIY methods often lack the control needed to ensure long-term success.
Final Thoughts on Insulating Attics with Spray Foam
Spray foam insulation can solve many of the heating and cooling struggles caused by a lack of attic insulation, which is often one of the main culprits in energy loss. This 2-in-1 feature acts as both an insulation and an air-sealing product, helping to increase energy efficiency, improve air quality, and make your home more comfortable. While it may seem expensive, the costs depend on the size of your attic and where you insulate, making it a worthwhile investment for its long-term benefits.
Looking for a reliable spray foam insulation expert? Contact us today, and we’ll connect you with trusted professionals who can help you achieve energy-efficient, cost-effective results for your attic. Don’t wait to improve your home’s comfort and save on energy bills!
FAQ
How Many Inches of Spray Foam Are Needed in an Attic?
For attics, closed-cell foam is recommended at 4 to 5 inches, while open-cell foam should be sprayed between 6 to 10 inches depending on the ceiling or roof requirements. This range ensures proper insulation and energy efficiency.
How Do You Spray Foam?
How Much Does It Cost to Spray Foam an Attic?
The average cost to spray foam an attic in an existing home typically ranges from $5,100 to $10,300, depending on the size and insulation needs of the space.
What Are the Different Types of Attic Spray Foam?
There are two types of spray foam insulation: closed-cell and open-cell, each suited for specific attic insulation needs.