When you feel cold drafts blowing through your home and notice high energy bills, it might be a sign to look into insulating your home’s existing walls. Comfort should always be a priority since it’s where you spend the most of your life and it’s one of your biggest investments.
If your walls aren’t properly insulated, perhaps after you’ve built a new home or are in the midst of renovating, adding spray foam insulation on existing walls could be a great solution. This material is excellent to increase wall insulation because it can be applied to walls that are already in place, all without having to tear them down. From personal experience, using spray foam in existing walls not only boosts insulation but also seals out drafts effectively, enhancing the overall comfort and energy efficiency of the home.
Can you add spray foam insulation to existing walls
When considering whether you can add spray foam insulation to existing walls, it’s important to understand that while existing insulation often needs to be removed, you don’t have to build a brand new wall. Adding spray foam is a favored approach due to numerous reasons. It’s an energy-efficient and cost-effective option that significantly reduces energy consumption and enhances the comfort of your home.
Foam effectively creates an air seal, which is essential in taking care of cold spots and sealing out those annoying drafts that can make winter months unbearable. From my own experience in home renovation, applying foam insulation to existing walls not only addresses insulation inefficiencies but also contributes to a more stable and comfortable indoor environment, especially in older homes where drafts and temperature inconsistencies are common issues.
How to Add foam insulation to existing walls
Adding foam insulation to existing walls is a practical solution for enhancing home energy efficiency and comfort. This process involves several steps but does not require extensive demolition, making it ideal for quick improvements.
- Inspect your existing walls for any signs of mold or dampness. If insulation is already present and you discover issues, you’ll need to remove the old insulation to prevent trapping moisture which can lead to further damage.
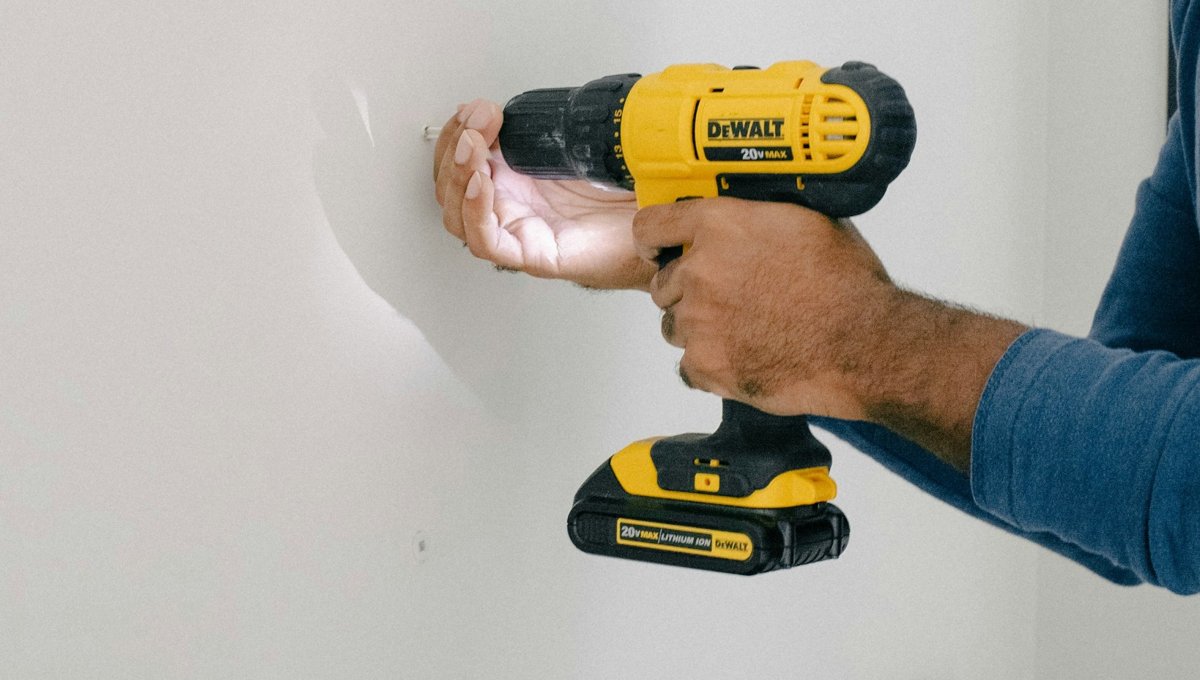
- Drill holes into the wall at strategic locations. These holes should be evenly spaced to ensure complete coverage inside the cavities.
- Inject the foam through these holes. Begin at one section, and once filled, move to the next section. The foam will fill all the gaps where there is no insulation.
- After the foam is injected and the sections are filled, allow it to expand and cure. This expansion helps the foam reach every nook and cranny, ensuring a thorough seal.
The process begins with a professional assessment to tailor the approach specifically to your home’s needs, ensuring that every detail is carefully planned for optimal sealing and insulation.
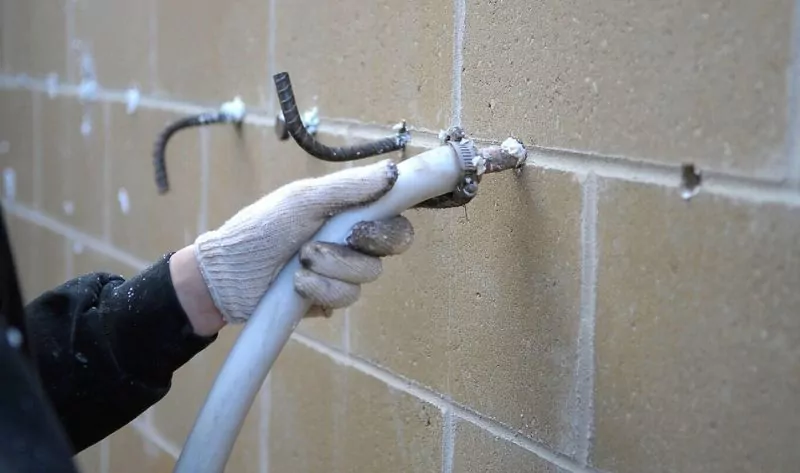
First, a professional will create several small holes, usually about one inch in diameter or smaller, in the wall cavities. Through these openings, they inject a liquid spray foam directly into the cavities. The foam starts to expand slowly, filling all crevices and gaps, perfectly adapting to the contours of the walls. This expansion ensures that the foam reaches every nook and cranny, creating a complete and secure seal.
As the foam finishes expanding, it hardens into a durable insulation material that not only seals effectively against air leaks but also significantly enhances the wall’s insulating properties. This method is recommended for its thorough coverage and ability to conform to the existing structure of the walls, making it an ideal solution for improving the insulation of any home.
Can I inject foam into the walls by myself?
When you think about adding insulation to existing walls, it’s tempting to wonder if injection foam can be a quick DIY solution. However, this isn’t as simple as buying a kit and getting the job done yourself. While foam kits may seem available for purchase online, the reality is, there aren’t any that are truly suited for injecting foam directly into walls without specialized equipment. The installation process involves more than just filling gaps; it requires precise injection techniques to ensure that every corner is properly sealed and insulated. If not done correctly, you risk leaving sections uninsulated or damaging your wall structure.
Applying foam insulation requires precise technique and safety equipment like masks, safety goggles, and protective suits, especially when working near open flames or spraying chemicals. Materials like the paint used for sealing can easily catch fire if exposed to incorrect handling. Therefore, it’s best to hire a professional with ample training and the necessary equipment to ensure the job is done right. Professionals understand how to install the insulation safely and effectively, making it a recommended route for most homeowners.
Cost of Foam Insulating Existing Walls
When considering adding foam insulation to existing walls, one of the first questions many homeowners have is about the cost of spray foam insulation. The price to insulate your exterior walls and effectively seal the building envelope typically ranges from $4,300 to $8,800. However, this cost can vary based on several factors.
The size of the treated area to be injected with foam insulation is the largest contributing factor to the overall cost of the project. Generally, the bigger the area that needs to be insulated, the more expensive the job will be. Costs can also fluctuate depending on the complexity of the installation and the specific conditions of your home’s walls.
Factors Influencing the Cost of Insulating Existing Walls
When planning to insulate existing walls, several variables determine the cost of the project. The size and surface area of the walls to be insulated are the most significant factors influencing the price. Larger or more complex areas typically lead to higher costs due to the increased amount of materials and labor required.
The type of home also plays a crucial role; for instance, a home with more than one story may incur additional costs due to the difficulty of the job. Moreover, the type of siding on the house can affect how easily insulation can be installed. Vinyl siding is the easiest to work with, while materials like brick and wood are the hardest, significantly increasing the installation cost. The method crews use to work on exterior walls, whether from the outside or otherwise, also adds to the complexity and overall total cost of insulating your home.
Comparing Siding Types for Insulation Installation
When insulating existing walls, the type of siding on your home can significantly change the installation process and impact the overall ease and effectiveness of the project. Each siding material—Vinyl, Aluminum, Brick, and Wood—presents unique challenges and benefits.
Vinyl Siding and Insulation
Vinyl siding is generally the easiest to work with when it comes to insulating walls. It features a hook-and-loop system that makes removing and replacing sections much easier. As a polymer material, it is pliable and won’t bend or crack easily, facilitating a smoother installation process.
Aluminum Siding Challenges
Conversely, Aluminum siding is more difficult to handle. It isn’t pliable, and if it bends, it must be carefully bent back into shape. This can often leave dimples and dents, making reinstallation a meticulous task. Additionally, aluminum is usually nailed or fastened to the exterior of the home, requiring crews to unfasten and then replace the nails once the job is finished, which can complicate the insulation process.
Insulating Brick Walls
Brick siding requires the most labor-intensive approach. Crews must drill three holes at the top, middle, and bottom of the wall cavity to properly inject the foam. As one person drills, another follows behind to clean up the dust. This meticulous process ensures the foam fills the cavity thoroughly without leaving gaps.
Wood Siding Specifics
Wood siding, often handled completely differently, involves drilling directly into the face of the wood from the outside. Crews use a chalk line to mark where to drill uniform 2 ½ inch holes. After the foam is injected, another team member plugs the holes with a tapered pine-faced plug that fits snugly but not too tight to crack the wood. This allows the homeowner to easily paint over the plugs to match the siding, seamlessly blending the repairs into the existing structure.
Insulating Exterior Walls from the Inside
When homeowners prefer not to have the exterior of their home drilled into, insulating from the inside becomes a viable option. This method is particularly useful for areas like the common wall between a house and garage, where maintaining the exterior appearance is crucial. The process involves careful prep work where crews lay down plastic to protect the home’s interior and use a vacuum system to clean up dust created during the job.
Crews measure and drill 2 ½ inch holes in the middle of the wall’s cavity, and then inject foam. This foam expands to fill the wall cavities thoroughly. After the foam is injected, holes are sealed with a Styrofoam plug, covered by mesh tape to hold it in place. A rough coat of mud is then spread over the area, requiring additional sanding and finishing by the homeowner or a contractor. This internal approach minimizes external alterations while effectively enhancing insulation.
How to Insulate a Wall Without Removing the Drywall
Adding insulation to exterior walls without removing the drywall presents an innovative way to enhance your home’s energy efficiency. The installation process for this type of project is intricate but does not disrupt the existing wall structure significantly. This approach is ideal when you want to maintain the interior aesthetics of your home while upgrading its insulation.
Before the actual installation day, thorough prep work is necessary. The crew will ask homeowners to remove pictures and decorations from the walls to prevent damage from the vibrations caused by drilling. It is also advisable to clear away outdoor furniture and cover landscaping in the work area to protect it from debris. An experienced team understands how to skillfully work around any obstacles, such as plants and outdoor features that can’t be moved.
The process begins when the team starts at one corner of the wall and uses a slim jim tool to locate the space between studs. They will then drill the first hole about 4 feet from the ground. Additional holes are drilled as needed to ensure that every cavity is properly filled with injection foam. The lead installer carefully injects the foam, while another crew member follows behind, cleaning up any excess and plugging the holes with Styrofoam. After the insulation is installed, the team cleans the siding and sweeps up any wood shavings from the ground, reinstalling anything that was moved and leaving the home as it was when they arrived. This well-coordinated assembly line ensures the project is completed quickly and efficiently.
Benefits of Insulating Existing Walls
Insulating the walls of your home is a project that often leads to significant improvements not just in comfort, but in financial savings as well. Here’s how adding insulation to existing walls, or enhancing what’s already there, can benefit you:
- Lower energy bills: Insulation acts as a barrier to heat exchange and helps maintain a consistent temperature within your home. This efficiency reduces the need for heating and cooling, thereby lowering your energy bills.
- Reduction in drafts: Gaps around outlets and light switch covers are common sources of drafts that can make your home feel chilly and uncomfortable. Proper insulation seals these gaps, cutting down on drafts that come from these openings.
- Enhanced comfort levels: With effective insulation, walls that were once cold to the touch will retain heat better, keeping your living space more comfortable throughout the year. This is especially noticeable during the colder months when exterior walls can transfer cold from outside.
- Noise reduction: Insulation can also serve as a sound barrier, reducing the amount of outside noise that enters your home. This is particularly beneficial in noisy neighborhoods or for homes near busy streets.
- Improved air quality: By sealing off unwanted airflows, insulation helps to maintain better air quality inside your house. It prevents outdoor allergens and pollutants from entering through cracks and crevices.
- Year-round comfort: Proper insulation with materials like spray foam and injection foam ensures your home stays cool in the summer and warm in the winter, creating a comfortable environment regardless of the season.
By insulating your walls, you not only save money on utility bills but also enhance the overall comfort and livability of your home. It’s an investment that pays off in more ways than one, making it a worthwhile enhancement for any homeowner.
When to Avoid Using Foam Insulation in Walls
While foam insulation offers numerous benefits for improving energy efficiency and comfort in homes, there are certain situations where it is advisable to avoid using this material in walls.
- Moisture Issues: If the existing walls have a history of moisture problems, such as water leaks or high humidity levels, spray foam may not be the best choice. This type of insulation can trap moisture within the walls, leading to potential mold growth and damage to the structure. It’s important to address these underlying moisture issues and ensure proper ventilation before applying spray foam.
- Structural Issues: Walls with significant movement, cracking, or instability should also be carefully evaluated. The expansion of spray foam could exacerbate these existing structural issues or even hide them, making it difficult to identify and rectify problems in the future. It’s crucial to stabilize any structural faults before installing spray foam.
- Electrical Wiring Concerns: When considering spray foam, it’s essential to ensure that all electrical wiring within the walls meets code requirements and is properly installed. Spray foam can make electrical wiring inaccessible, posing fire hazards and creating difficulties if repairs or modifications are needed later on. Always address these concerns before you proceed with the project to avoid compromising safety.
Final Thoughts on Foam Insulation in Existing Walls
Adding spray foam insulation to existing walls is a smart choice for homeowners looking to enhance their home’s energy efficiency, comfort, and long-term value. While it’s tempting to consider DIY options, the process requires precision, expertise, and the right tools to ensure a thorough and safe installation. Hiring a professional ensures your walls are properly sealed, reducing drafts, improving air quality, and lowering energy costs. While it may seem like a DIY project, the precision and expertise required make professional installation a smarter choice for long-term benefits.
Need help finding a trusted spray foam insulation contractor for your existing walls? Contact us today, and we’ll connect you with experienced professionals who can handle the job safely and efficiently. Enjoy a more comfortable, energy-efficient home with expert insulation services!
FAQ
How do you add spray foam insulation to existing walls?
To install spray foam insulation in an existing wall, create a few small holes about one inch or less in diameter. Then inject the liquid spray foam directly into the wall cavity. Once injected, the foam will begin to slowly expand and fill every nook and cranny, ensuring thorough coverage.
Where should you not use spray foam insulation?
Avoid applying spray foam insulation directly against electrical wiring, fixtures, or recessed lighting unless they are specifically rated for contact with insulation. Inappropriate contact can cause overheating and pose a fire hazard.
How to insulate walls without removing drywall?
To insulate a wall that already has drywall up, consider using blown insulation, such as fiberglass or mineral wool. Blowers for applying this type of insulation are available at many building supply stores, which may offer a discount if you buy the insulation from them.
What is the best insulation for existing walls?
Loose-fill insulation, including cellulose and blown-in fiberglass, is ideal for insulating existing walls and attics without requiring major demolition. It can be blown into wall cavities and is excellent for covering irregularly shaped areas effectively.