
If you’re looking to remove spray foam insulation from various surfaces in your home, understanding the right approach is crucial, especially when it’s about maintaining an energy efficient and comfortable living space. Spray foam insulation is a fantastic way to seal your home, but there are times when removal is necessary due to a mistake, renovation, or replacement needs. Whether the foam has cured or not plays a significant role in determining your approach.
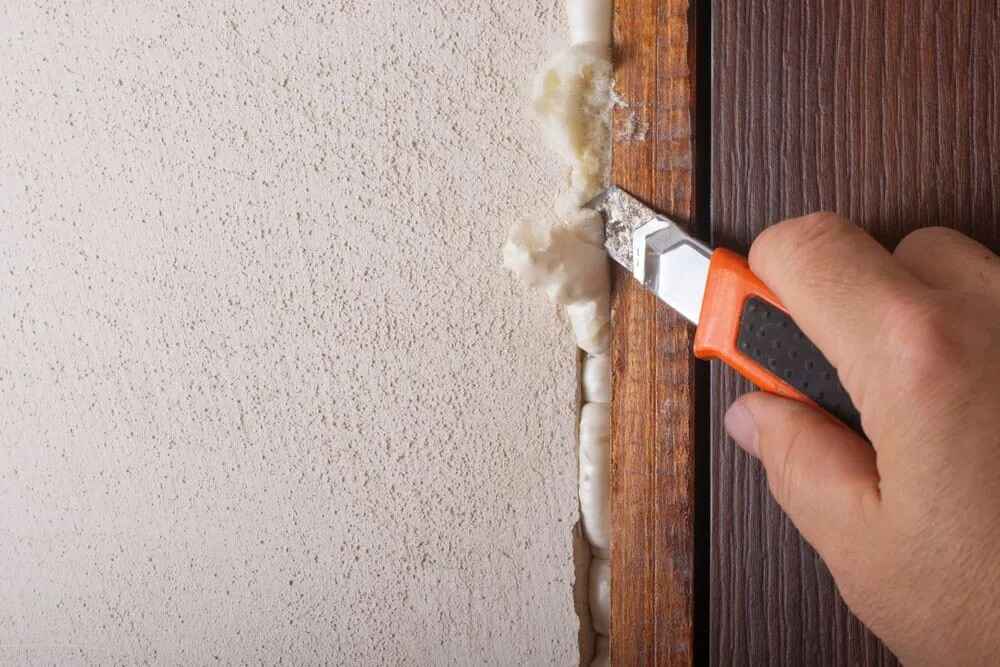
When tackling the challenge of how to remove expanding foam, it’s important to know the different methods that can be applied. The process can vary based on how long the foam has been set. If you have just applied the foam and recognized a mistake, immediate action is easier and less cumbersome. For foam that has cured, more robust techniques are required, such as mechanical cutting or the application of solvents. Tips for removing spray foam often include using a sharp blade for cutting away excess foam and employing solvents safely to dissolve any stubborn residues. It’s always important to proceed with caution and use protective gear, as spray foam can adhere strongly and become quite tricky to remove.
Why You Might Need to Remove Spray Foam
Spray foam insulation is heralded for its ability to make any building more energy-efficient and comfortable. It is a durable, non-toxic, and environmentally friendly product ideal for air-sealing homes. However, situations may arise where removal of spray foam is necessary. For instance, when spray foam is damaged by pests, moisture, or fire, it can compromise the areas it was meant to protect, such as attics and basement walls. Additionally, improper installation that affects air quality or isn’t allowed to cure properly can release toxins and smells, making it imperative to remove and reapply correctly.
Renovations often lead to removal as well, especially if you’re looking to upgrade to a new type of spray foam to achieve a higher R-value. In these cases, there are two ways to remove spray foam – manually or with a machine, depending on how extensively the foam was applied and the surface coverage. Knowing how to remove the foam safely and efficiently requires expertise and understanding of the potential complications that improper handling could cause.
Also Read: Is Spray Foam Insulation Safe After It Cures?
Understanding the Types of Spray Foam
Removing spray foam starts with understanding the type you are dealing with. There are three main types of spray foam, each with different properties and removal techniques:
- Open Cell Spray Foam: This type is more pliable and manageable to remove. Its softer and less dense structure allows for easier cutting and scraping without the need for heavy tools.
- Canned Foam: Often used for smaller gaps, this foam is a bit more challenging to remove than open cell because it cures harder and adheres more firmly to surfaces.
- Closed Cell Spray Foam: Known for its robust and dense structure, this foam is the most challenging to remove. Its high density and strength make it a permanent solution for insulation and moisture barriers, requiring specialized equipment for removal.
It is important to remember that spray foam is designed to be a permanent solution, so removal is often more complicated than installation. Professionals with specialized equipment typically install these foams, and similar expertise may be needed to remove them effectively without damaging the underlying structures.
Manual Removal of Spray Foam Insulation
Removing spray foam can be a frustrating chore if not done correctly. It requires preparation and following the right guideline to avoid damage. The best approach is to take the proper steps from the start, ensuring that every action is taken with care for a smooth removal process.
Step 1: Safety First:Wearing A Mask
Before removing spray foam, it’s crucial to protect yourself since spray foam can be a nasty substance. Composed of polyol and isocyanate resin, these chemicals expand and react to form a solid barrier, providing long-term heat protection. When disturbed, foam particles that are normally safe can become airborne and hazardous. Therefore, wearing a mask is essential to prevent these particles from entering your lungs and the atmosphere.
Step 2: Use Appropriate Tools
For the physical removal of foam, hand tools are your best option:
- Serrated Blades and Bread knives are effective for cutting through less dense foam.
- Flat Bars and Putty Knives prove useful for prying or popping off foam, especially in more open areas.
- Curry Combs, typically equestrian tools, are excellent for shaving off closed cell foam.
- For larger chunks of open cell foam, using your hands may be sufficient, but be cautious of underlying materials like wood and nails.
When dealing with closed cell foam, Power Tools should be used with caution:
- A Power Drill or Grinder with a Wire Wheel is ideal for removing large amounts.
- Reciprocating Saws with Special Attachments can cut foam flush with studs, suitable for more specific removal tasks.
- CI Cutters are heavy-duty machines perfect for shaving foam back to the studs.
Step 3: Allow the Insulation to Dry
It’s important to allow the insulation to dry fully if an error was made during installation. Do not attempt to remove the insulation immediately after it has been installed. Wait for it to dry completely; removing it becomes much easier once it hardens.
Step 4: Remove the Excess Insulation
Once the foam has hardened, you can begin to remove the excess insulation. Utilize a saw or suitable tool to cut away the hardened foam from construction material. For areas that are tough to reach or particularly thick, like around a door, use a hammer and chisel. Be careful to avoid damaging any hidden electrical wires while you work.
Step 5: Use a Hard-Bristled Brush for Remaining Foam
For any remaining spray foam that you can’t remove with larger tools, switch to a hard-bristled brush. This tool works well on brick, wood, and concrete, getting into corners and crevices where foam might still linger. If needed, use different-sized brushes to reach all areas effectively. Continue to brush carefully, and if you cannot remove all the foam in one go, it may be necessary to return to the area in another session for complete cleanup.
This approach emphasizes careful preparation and attention to detail, ensuring that all spray foam insulation is removed safely and effectively without causing damage to your property or risking personal safety.
Step 6: Applying Lacquer Thinner for Foam Removal
- Apply lacquer thinner carefully to areas where spray foam has not fully cured. This solvent is effective in dissolving uncured polyurethane products, making them easier to remove.
- Lacquer thinner is often used by spray foam contractors to break down the insulating foam and larger particles. If lacquer thinner is not available, nail polish remover, which contains acetone, can also be used as it similarly dissolves the uncured polyurethane. However, take note that neither nail polish remover nor lacquer thinner are effective on cured foams.
Step 7: Clean Up After Removal
- Cleaning up after the removal process is crucial. For removing small amounts of residue, a dustpan and brush may be sufficient.
- If the job involves more substantial quantities of spray foam insulation, a heavier-duty solution might be needed to ensure all remnants are eradicated from the site.
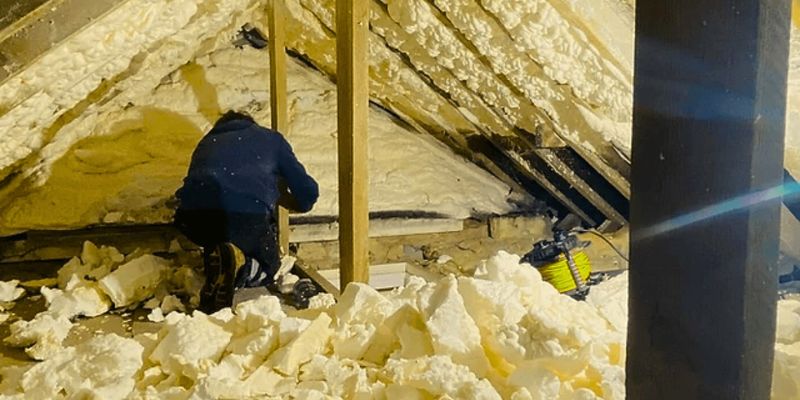
Using Machinery to Remove Spray Foam Insulation
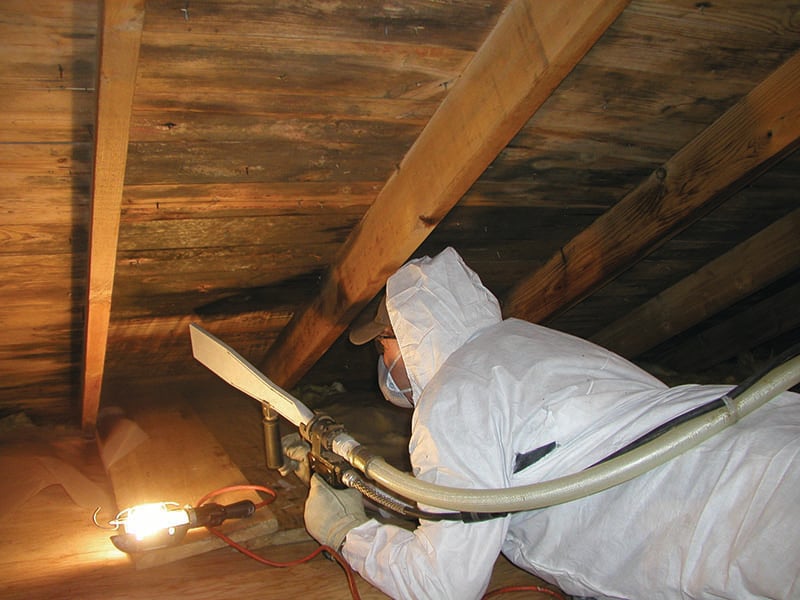
Step 1: Put Your Mask On
- Before starting, ensure you wear a mask to avoid inhaling errant particles. Safety is crucial when dealing with materials that can be hazardous if airborne.
Step 2: Connect the Spray Foam Machine to the Vacuum Hose
- Connect the spray foam machine to the vacuum hose. This setup is essential for ensuring the insulation is easily removed. The machine harnesses significant power, which is required to effectively run the spray foam vacuum unit.
- Due to its size and the power needed, it’s not practical to move this equipment into tight places, such as attics. However, most units come equipped with expandable hoses that act like giant vacuum cleaners, able to run through an entire building.
- Attach the vacuum bag to collect the materials as you slurp them up, placing the hose exactly where you want it for maximum efficiency.
Step 3: Remove the Spray Foam from the Wall
- To remove spray foam from the wall, conventional vacuum systems may be powerful but often are not enough to clear dried-on foam effectively. For these tough scenarios, use the above method to chip away at the foam from construction materials. This process typically involves more manual tools to scrape or cut away the hardened material.
Step 4: Vacuum Up the Old Insulation
- Vacuum up the old insulation using spray foam machines that function like large vacuum cleaners with a lot of power. These machines are designed to handle damaged or incorrectly applied insulation, significantly reducing the time it takes to clear an area. Even for old, damaged insulation in spaces like the attic, a good machine can clean up in a single trip, saving time and money.
Step 5: Apply the Lacquer
- Apply lacquer thinner to any surfaces where spray foam remains. This step is crucial for cleaning up any residual material and is particularly effective if the foam has not yet fully cured. For regular foam, this step might not be necessary, but for more stubborn or chemically resistant types, lacquer thinner helps finalize the cleanup process.
These steps guide you through using mechanical means to efficiently tackle the removal of spray foam insulation, ensuring that even the most stubborn foam can be managed without leaving residues that could compromise the integrity of your building structure.
Natural Remedies for Removing Spray Foam
Baking Soda and Oil
When it comes to removing spray foam without the use of harsh chemicals, a few natural remedies can be surprisingly effective. One popular method involves Baking Soda and Oil. This approach uses common items from your kitchen cabinet to create a solution that tackles the stickiness of cured polyurethane foams. Mixing baking soda with a lubricating oil such as olive or coconut forms a gritty paste. When applied generously to the affected area and rubbed gently, this homemade concoction acts as a mild abrasive. The baking soda provides a scrubbing effect while the oil helps to lift dried foam bits, making them easier to scrape away with a knife or saw.
White vinegar
Another effective natural cleaner is White vinegar, which can be used to soften and dissolve spray foam residues. Simply apply vinegar directly to the foam and let it sit for several hours before attempting to remove it with a scraper. This method can be particularly useful for dealing with foam that hasn’t fully hardened or is resistant to other solvents like nail polish remover. Both these techniques offer a safer, environmentally-friendly way to deal with the aftermath of insulation materials, reducing the potential for irritation and other drying effects on the skin. Using these simple at-home tricks can save the day, especially in a sticky situation where conventional cleaners might fail.
Removing Spray Foam from Different Surfaces
Removing spray foam from various surfaces such as clothes, skin, and carpet requires specific approaches depending on the surface and whether the foam has dried or not. For clothes and carpet, it’s crucial to act quickly before the foam sets. Gently scrape off the excess foam with a dull knife or a spoon, and then use a solvent like acetone or rubbing alcohol applied to a clean cloth to blot out any remnants. For these materials, thorough cleaning usually follows to ensure all traces of the solvent and foam are gone.
Removing Spray Foam from Skin
When it comes to removing spray foam from skin, the process should be gentle to avoid irritation. If the foam is not dried, moisten a clean cloth with either acetone or nail polish remover and rub gently over the affected area. This method helps to break down the foam without harsh scrubbing, which can damage the skin. If the foam has dried, the removal process becomes more difficult, requiring oils or lotions to soften the foam before attempting to peel it away slowly. Always wash the area thoroughly after removal to prevent any chemical residues from irritating the skin.
Removing Spray Foam from Clothes
Applying spray foam near fabrics isn’t advisable, but if it happens, use an old cloth that can be disposed of afterward. If spray foam lands on clothes and it’s still wet, act quickly to remove it.
Steps to follow:
- Wear gloves to avoid skin contact with the foam.
- Use an old rag or paper towel to wipe off as much spray foam as possible from the clothes.
- Blot the area of the cloth with spray foam using a rag moistened with acetone.
- Continue this step until the spray foam is gone.
- The last step is to wash the clothes with a stain remover to ensure all residues are removed.
Removing Spray Foam from Carpets
When it comes to removing spray foam from carpets, the best way is to address it as soon as possible. Once it dries, it becomes significantly more difficult to get off.
Steps to follow:
- Wipe off the spray foam on the carpet immediately with a clean rag. To effectively remove the foam, pull upwards while pinching the carpet with the rag, which helps avoid pushing the foam down into the carpet pile.
- To remove the remaining spray foam, pour a small amount of acetone on the area and wipe it off with a rag.
- If the foam has dried up on the carpet fibers, use a pair of scissors to cut off the hardened foam or try to pull it out with your hands.
- Finally, dispose of the pulled carpet fibers and trim the carpet to make it even and tidy.
Removing Spray Foam from Wood
- Removing spray foam from wood does not involve too many complex steps. Initially, cut through the thick layer of spray foam using a sharp knife. After the bulk of the foam has been removed, sand the remaining spray foam off the wood surface using sandpaper to smooth it out. Alternatively, you can apply a saline solution to the wood and clean it with a damp cloth or sponge after letting it sit for about 5 minutes to soften the foam for easier removal.
Removing Spray Foam from Concrete
- For concrete surfaces, chisel and hammer are your best tools. Chisel away the spray foam carefully and then use the hammer to break up any remaining pieces of foam. This method ensures that the foam is completely removed from the rough surfaces of the concrete without leaving residues.
Removing Spray Foam from Metal
- When dealing with metal surfaces, it’s advisable to tackle the spray foam while it’s still wet, as it becomes significantly more challenging to remove once cured. Start by using a scraper to cut away as much foam as possible. To soften the residual foam, wet the metal by applying solvents such as acetone or alcohol with a cloth. Allow the solvent to sit for a few minutes, then use a brush to scrub the wet metal. Finally, rinse the metal with warm water to clear any remaining foam and solvent.
These methods provide targeted approaches to removing spray foam insulation depending on the surface involved, ensuring effective removal while minimizing damage to the underlying material.
Safety Considerations for Removing Spray Foam Insulation
When removing spray foam insulation, it’s crucial to prioritize safety due to the potentially hazardous nature of the materials involved.
- Wearing protective gear—including gloves, goggles, and a mask—is essential to protect yourself from foam particles that can be harmful if inhaled.
- Ensure you are working in a ventilated area to maintain good airflow, which helps avoid inhaling any particles.
- Be cautious with power tools to prevent damaging structural elements like studs.
- Following certain safety measures is necessary to minimize health risks.
- Always cover your body thoroughly to reduce the risk of inhalation and skin contact.
- Before you start, turn off the HVAC system to prevent the spread of particles throughout your home.
- Make sure to use the right tools for removal and dispose of the removed material properly in airtight bags to avoid any secondary contamination.
These precautions help ensure a safe and effective removal process.
Final Thoughts
Removing spray foam insulation requires the right tools, techniques, and safety measures to ensure an effective and damage-free process. Whether dealing with open cell, canned foam, or the more durable closed cell spray foam, each type demands a tailored approach, from simple scraping to advanced machinery. Common household solutions like vinegar and baking soda with oil can handle light residues, while tools such as serrated blades and lacquer thinner are better for stubborn areas. Always prioritize safety by using protective gear and working in ventilated spaces. With careful preparation and understanding, you can confidently tackle the challenges of spray foam removal and maintain a comfortable, energy-efficient home.
FAQ
Can Spray Foam Insulation Be Easily Removed?
Removing spray foam insulation depends on its three main types. Open Cell Spray Foam is pliable and easy to remove, making it the most manageable option. Canned Foam is a bit more challenging, while Closed Cell Spray Foam is robust and most challenging to handle. Understanding these types helps simplify the process.
What Dissolves Cured Spray Foam Insulation?
Vinegar, especially white vinegar, can be used to help remove cured spray foam insulation effectively. Simply apply it to the foam and let it sit for several hours. After that, a scrapper can be used to gently clear away the softened material as the vinegar dissolves the hardened insulation.
Does WD-40 Remove Cured Expanding Foam?
Yes, WD-40 or acetone can help remove un-cured expanding foam by breaking down the remaining material without harming the surface, as long as it isn’t easily damaged by chemicals. For cured foam, mechanical methods like sanding or scraping are the best options.
How Much Does It Cost to Get Spray Foam Removed?
The average cost of spray foam insulation removal ranges between £20 and £50 per square meter in 2024. Homeowners and property managers can expect these prices to vary widely depending on the project complexity and other factors.