Attic insulation is often an overlooked aspect of making your home more comfortable and energy-efficient, especially during summertime when keeping your space cool matters most. Many homeowners invest a vast amount of money and time in ventilating their attic and adding attic insulation, only to notice rising utility bills. This issue often stems from the attic hatch, a subset of problems in the realm of home efficiency that go unnoticed.

These hatches are a common source of radiant heat loss, as they frequently have air leaks or poorly sealed edges. Whether the hatch is in a hallway, closet, or hidden from sight, it can create serious inefficiencies in both heating and cooling systems. Using tools like a blower door and infrared camera, the problem becomes obvious, but it’s rarely fixed proactively. Homeowners should focus on proper insulation and air sealing to address these issues. Taking the time to insulate attic hatch can significantly reduce energy waste and improve overall efficiency. By dedicating the right resources to this category, you can solve a significant problem in your home and avoid wasting money on unnecessary energy expenses.
How to Stop Heat Loss Through an Attic Hatch
One of the most common problems in a home is the attic hatch. This seemingly small scuttle hole in your ceiling could be the main culprit behind your home losing indoor heat during winter or becoming uncomfortably warm in summertime. If the space around your access hatch isn’t properly insulated or sealed, it can allow air leaks to occur. A poorly insulated attic can cause heat loss during fall and winter, and this results in significant heat loss during cold weather while also letting hot air enter during warmer months. Worse, without proper sealing, you may also notice dust, dirt, or debris falling onto your floors, furniture, or clothes from the attic access.
To fix this, the goal is two-fold: air-sealing the attic door or stairs to prevent air-transported heat loss, and beefing up the insulation. Check for gaps around the finished trim or paint of the hatch, which may appear fine but could actually be a huge heat sink. By sealing the edges with proper materials, you can stop warm air from escaping down into the house in winter or radiating heat into your space during the summers. This simple improvement can make your home more efficient and comfortable while protecting it from the effects of weather both inside and outside.
How to Seal the Trim Around an Attic Hatch
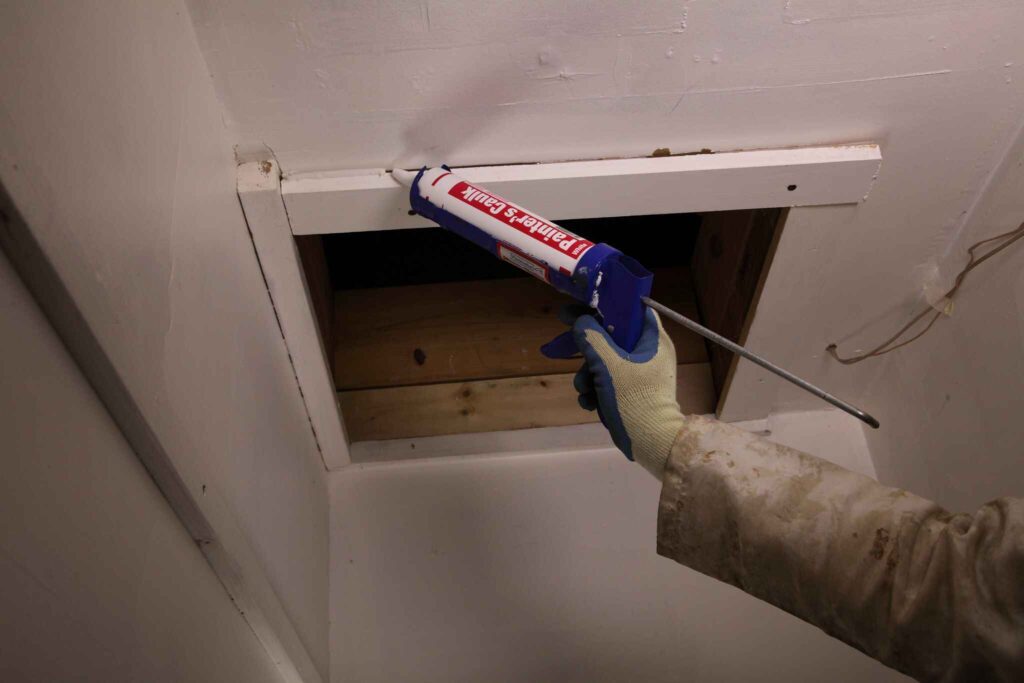
The first step to ensure proper insulation of your attic hatch is air-sealing the trim and the surrounding enclosure. Start by carefully pulling down the finish trim and setting it aside. Use caulk for smaller gaps and foam sealant for larger ones to seal the space between the framing and the drywall. Make sure to apply a bead of caulk on the inside and outside edges of the trim before you reattach it. Don’t forget to inspect both sides of the attic door and address any holes or gaps that might allow air to escape.
To reinforce the sealing, consider installing weather stripping around the moldings, as this can make the hatch more durable and tightly air-sealed. Adding fasteners can also help ensure that the hatch rests securely and prevents drafts. Providing enough space around the opening for adjustments is critical, and using the right materials, such as gaskets, can make the process more effective. By focusing on these details, you can significantly improve your attic’s insulation and reduce energy loss.
Air-Sealing the Hatch Perimeter
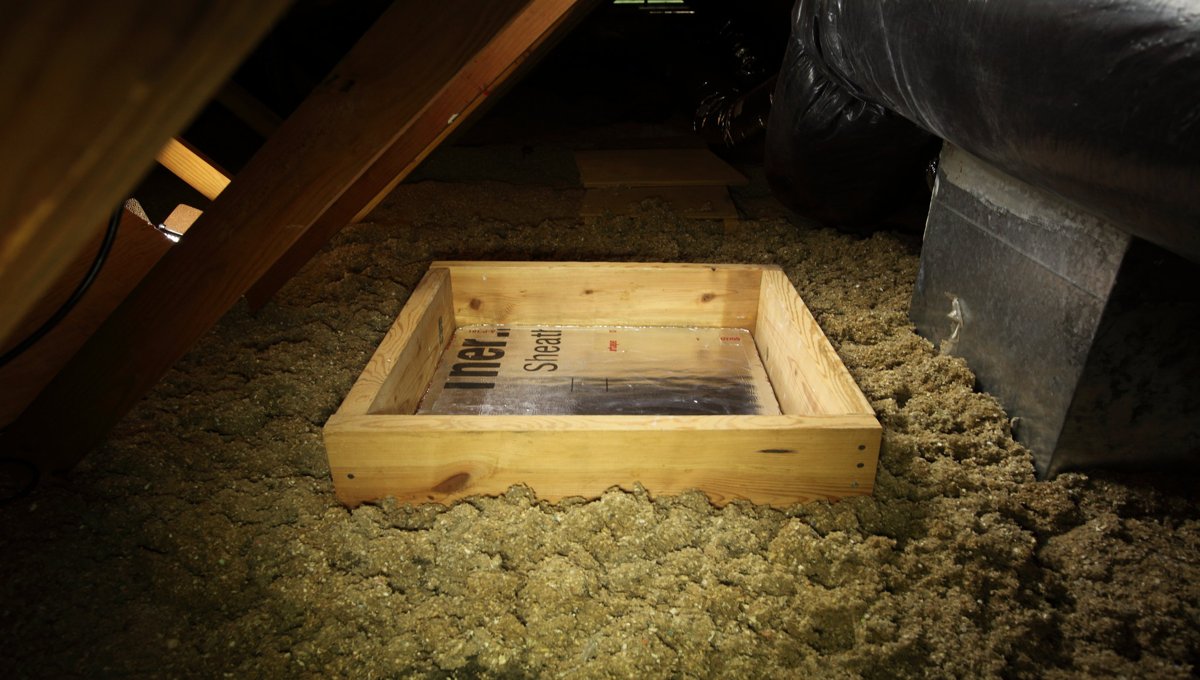
To properly air-seal the hatch perimeter, start by ensuring the plywood hatch rests securely on the small wood strip or lip. Following the standard air-sealing recommendation, you can install a compression bulb weatherstrip to create a tight seal. For enhanced durability, this can be beefed up with a sealing gasket, similar to what is used on a refrigerator door. Gaskets are more durable and can produce a tighter seal, preventing air leaks and improving energy efficiency.
Insulating the Hatch for Energy Efficiency
To insulate your attic hatch effectively, start by cutting a foam board to about 1/2″ less than the size of the hatch on each side. A foil-faced polyiso board is one of the greenest and best-performing rigid options. Once ready, apply a bead of foam-compatible glue to the board and attach it securely to the plywood. For optimal results, add at least 4 inches, or preferably 8 inches, of foam, layering if needed, to achieve the recommended thickness. This insulation helps maintain your attic space’s temperature by minimizing air leakage.
As a finishing step, seal the edges with a construction adhesive or additional foam layers. Consider topping it with a layer of fiberglass batt insulation for improved thermal performance. A helpful tip is to use a flat, rolled foam with a paper backing to create a smooth and mess-free surface. Make sure to cut the foam about a quarter inch smaller than the hatch dimensions for easy handling. With this approach, your hatch will remain insulated, energy-efficient, and easy to open when needed.
Installing a Hook-And-Eye Latch
To make your attic hatch more secure and efficient, install a hook-and-eye latch. These simple fasteners are situated to keep the hatch tightly closed, ensuring that it compresses the gasket for an effective air-seal. When the hatch is pulled down forcefully, the latch prevents air from leaking and addresses common efficiency problems that are often in plain sight but rarely addressed.
Adding a handle to the hatch makes it easier to pull or adjust, while the latch ensures that the hole remains entirely air-sealed. This upgrade can help save money, improve comfort, and make your house more energy-efficient by preventing unnecessary air loss. By taking the time to properly insulate and securely close the hatch, you tackle a problem that many overlook, enhancing the overall efficiency of your home.
Final Thoughts
The attic door may seem like a negligible feature, but it plays a significant role in making homes safe, comfortable, and energy-efficient. Without proper insulation, your efforts to ventilate the attic and spend on improvements can be wasted. Paying attention to small, yet crucial parts like an insulated attic access door can save energy and money. If you’re not confident insulating the hatch, hiring a certified specialist can ensure the job is done right the first time, making your home more efficient and secure.
FAQ
Should an attic hatch be insulated?
Yes, attic hatches should be properly insulated to match the R-value of the rest of the insulation. The capacity of insulation to resist heat flow is crucial for energy efficiency. Different access types, such as standard or ladder hatches, may vary, but following the right tips ensures better performance.
How to weather proof an attic hatch?
Start by sealing the access hatch with self-sticking weather stripping to prevent air leaks. If the hatch rests directly on the moldings, add 2-1/2 inch wide stops around the opening. These stops provide a wider surface for attaching weatherstrip and creating enough space to mount hook-and-eye fasteners securely.
How to insulate a ceiling hatch?
To fix the problem, apply a piece of insulated foam board to the back of the door or hatch. Add weatherstripping around the frame to seal gaps. The materials are cheap, widely available, and easy to work with. This project only takes half an hour to complete.
How much heat is lost through an attic hatch?
A poorly insulated attic can cause up to 25% heat loss during fall and winter, increasing your average heating costs. This wasted energy prevents your home from staying warm efficiently.